Ultimate Gluten Free Pie Crust
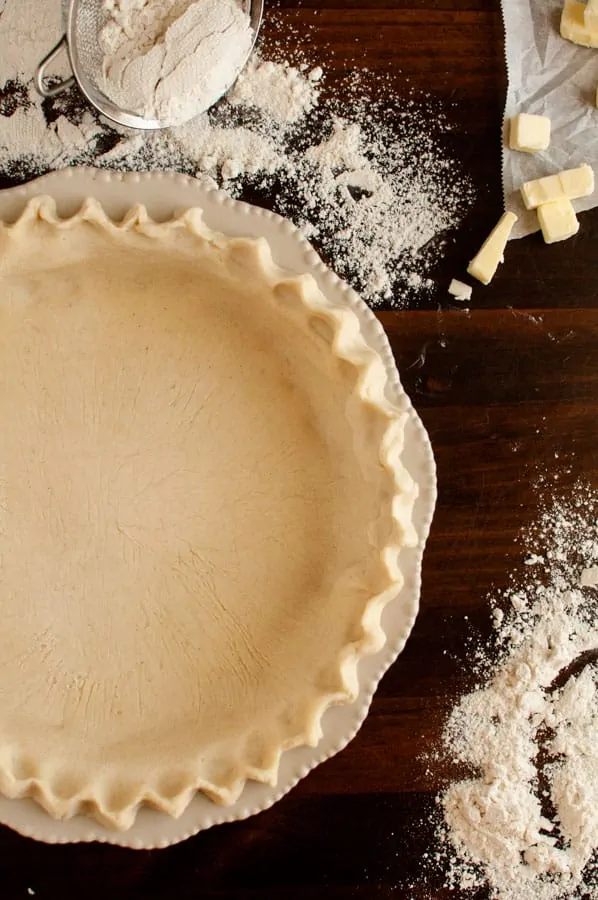
Who says you can’t have a gluten free pie crust that is tender, flaky, and delicious!? Savory, sweet, pre-baked or not, this Ultimate Gluten Free Pie Crust recipe works for it all!
I have made a variety of pie crusts but typically come back to the traditional crust for its overall compatibility with any flavor of dish. This recipe has been adapted from the “America’s Test Kitchen” recipe, but I have streamlined the process to reduce the chill time and use more common household ingredients. My version doesn’t require you to make your own flour blend, and works great with most any white rice based flour blends. However, you will want to note if your blend includes xanthan gum or not, and adjust accordingly (see recipe notes).
You can work this dough traditionally in a bowl with a pastry blender or, If you have one, a food processor makes mixing the pie dough a piece of cake! (er, I mean pie…)
How Do I Keep This Crust Flaky and Tender?
Since there is no gluten in this crust then you don’t need to worry about over-mixing the dough in the traditional sense that it will toughen it up. However, you do need to consider how much mixing the dough is softening your butter.
The key to keeping this pie crust flaky is working with extra cold ingredients. Be sure you are using ice water, as well as using butter that is straight from the fridge.
Another helpful addition is vinegar. You don’t even notice the flavor once the crust bakes, as it is a miniscule amount. Both the combination of acids in the sour cream and vinegar work together to tenderize the dough.
But the Dough is Sticky, How Do I Roll it Out?
The “America’s Test Kitchen” method for rolling gluten free pie crust dough, has now become my go-to method for almost any pastry dough.
The best way to keep this dough workable is to keep this dough cold. I repeat. Keep the dough cold! This means no skimping on the chill time before you roll the dough out (you know who you are. 😉). If you really need to skimp and are tight on time, then you can put it in the freezer for 15 minutes before rolling it out.
Don’t even bother trying to use flour and roll this out traditionally as it will be a sticky mess!
- Create a work-surface of plastic wrap for the dough to be rolled out on.
- Place your chilled dough on the plastic wrap surface and place another layer of plastic on top of the dough. The dough should be sandwiched between the two layers of plastic.
- Using a rolling pin, you can now roll out the dough between the two layers of plastic until big enough for your pie plate.
- Peel off the top layer of plastic and place your pie dish upside down in the center of the rolled out dough.
- With one hand under the dough, and the other on top of the pie pan, slowly invert the pie crust into the dish.
- Carefully peel off the remaining layer of plastic that is now on top.
Voilá! Now you don’t even have a rolling pin to wash!
If you are making a double crust recipe, then be sure to chill the bottom crust while you are rolling out the top crust.
Some Great Pie Recipe You Might Enjoy are:
Ultimate Gluten Free Pie Crust
Who says you can't have gluten free pie crust that is tender and flaky? This pie crust recipe is a gluten free version of a traditional pie crust and is compatible with either sweet or savory pies! The dough can be made up to 2 days ahead of time to keep things extra simple.
Ingredients
Double Crust Measurements:
- 13oz (2 3/4 C. + 2Tbsp.) Gluten Free Flour Blend (Bobs Red Mill 1 to 1 Baking Flour)* See Note
- 2 tsp. Sugar
- 3/4 tsp. Salt
- 16 Tbsp Butter, Chilled and cut into 1/4" pieces
- 6 Tbsp. Ice Water
- 3 Tbsp. Sour Cream
- 1 Tbsp. Vinegar
Single Crust Measurements:
- 6 1/2oz (3/4C. + 2/3 C.) Gluten Free Flour Blend (Bobs Red Mill 1 to 1 Baking Flour)* See Note
- 1 tsp. Sugar
- 1/2 tsp. Salt
- 8 Tbsp. Butter, chilled and cut into 1/4" pieces
- 3 Tbsp. Ice Water
- 1 1/2 Tbsp. Sour Cream
- 1 1/2 tsp. Vinegar
Instructions
- In a small bowl combine your water, sour cream and vinegar. Set aside.
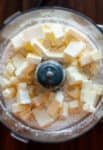
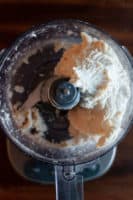
- In the work bowl of a food processor, combine flour sugar and salt.
- Pulse to blend.
- Add butter pieces and pulse until a course meal is created and butter chunks are crumbly pea sized pieces (alternatively you can use a pastry blender in a regular bowl)

- Pour in wet ingredients and pulse until mixture comes together in large smooth pieces around the blade. (or work by hand until very thoroughly incorporated.)

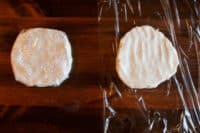
- Set each crust portion of dough (for double crust, divide dough into 2 even amounts) onto large section of plastic wrap and flatten into 5" patties.

- Place dough in fridge to chill for 1hr or until ready to use.
- Remove dough from fridge and let sit on counter to soften until just workable, about 15 minutes. You want to work with the dough cold.
- To create your work surface, spread out a large layer of plastic wrap on counter for rolling your dough. (I used 2 strips to make it wide enough)
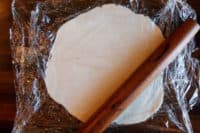
- Place chilled dough on plastic wrap work surface. Lay an additional layer of plastic wrap on top of dough, sandwiching dough between two layers of plastic.
- With a rolling pin, roll out the dough between the layers of plastic until large enough for a 9" pie dish.
- Peel off top layer of plastic and set your pie dish, face down on the rolled-out pie dough.
- Placing one hand under the pie dough, and the other on top of the pie dish, invert the dough into the pie dish to create a bottom crust. Peel off remaining plastic
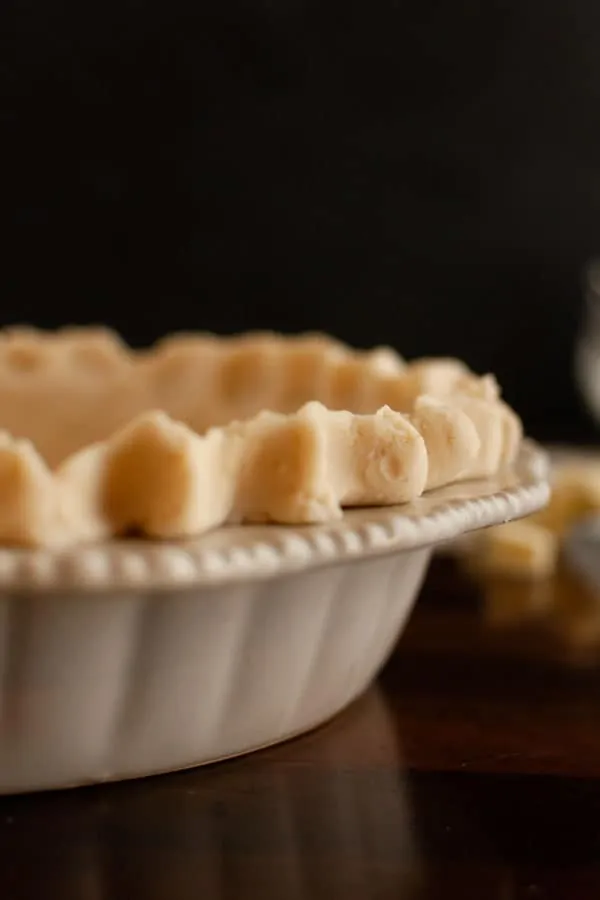
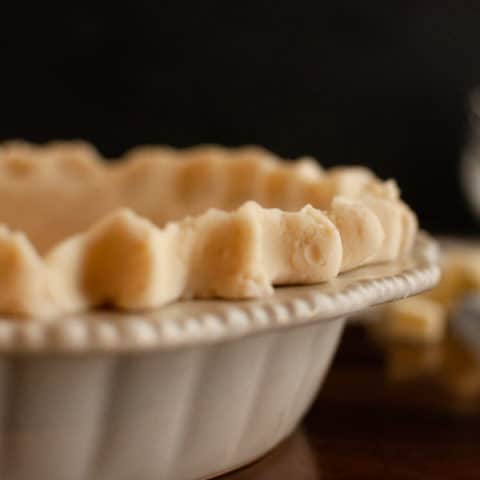
- At this point you can trim and crimp edge as desired, or fill pie and repeat the rolling out process for a top crust if using. If doing top crust, place your bottom crust in the freezer before filling, while you roll top crust.
- Chill finished crust in the freezer for 15 minutes before baking to re-harden butter.
- For partially baked shell, bake at 375° F on lower-middle rack of oven 20-25 minutes until lightly golden, rotating pie dish half-way through baking. For fully baked shell, add an additional 5 minutes.
Notes
•Gluten free flour blends vary widely, "Bob's Red Mill 1 to 1 Baking Flour Blend" is a white rice flour base and includes xanthan gum. If you use a different brand results may vary, so try and find a white rice based blend. If your blend doesn't have xanthan gum then add add 1/4tsp, per crust, to dry ingredients.
•With brands varying so widely, accuracy in measuring flour can vary as well. It is best to measure with a kitchen scale. If you don't have one, then be sure to sift your flour and then scoop it gently into measuring cup and level it off with a knife to get the most consistent measurement.
•Dough Can be made ahead of time through step 7 and refrigerated up to 2 days.
Nutrition Information:
Yield:
16Serving Size:
1Amount Per Serving: Calories: 362Total Fat: 18gSaturated Fat: 11gTrans Fat: 1gUnsaturated Fat: 6gCholesterol: 48mgSodium: 321mgCarbohydrates: 43gFiber: 1gSugar: 1gProtein: 6g
*Nutrition information is automatically calculated and may not always be accurate.
Gluten-free pie crust is perfect for the holiday season. I have tried a few times, yet to achieve a flaky crust. Thanks for all the tips, will keep in mind.
This is perfect! I can’t wait to make this recipe! Thanks for all the tips!!
What a lot of great tips! Funny thing…. many years ago my mom used a little vinegar in her traditional pie crust too!
Such a simple addition but the acid totally makes sense for keeping it tender!
This looks like the perfect pie crust! Some excellent tips here too. A few of my friends are on a gluten-free diet they are going to love this! Thanks so much for sharing.
I have been searching for the perfect g-f pie crust for 3 years. Unsure if it is actually using Bob’s 1:1 Baking flour or your detailed instructions, which I followed to a “T” but this was finally something I can make over and over again. Delish, light, flaky…in a word, PERFECT! I did keep everything VERY cold during every possible step of making the recipe. When rolled out I had to pat a little water onto the dough to keep the edges from cracking too much. Used plastic wrap as recommended and that worked too. Hubby has to eat gluten free suddenly in our old age so this is now my life-saver go-to recipe. Thank you so much for making my life better.