Gluten Free, No Yeast, Pizza Crust
Everyone needs a standby pizza crust recipe, and when you eat gluten free it is no different. This gluten free, no yeast, pizza crust recipe is our favorite go-to recipe and can be made last minute since you don’t need to let it rise!
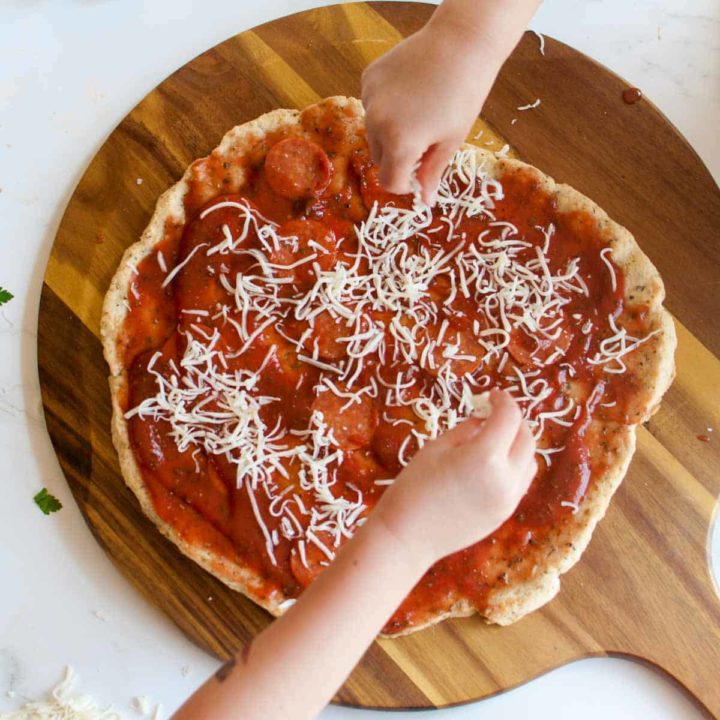
In addition to being gluten free, this crust has the bonus of also being a low carb pizza crust. It provides a whole lot of flavor, is remarkably sturdy for all your toppings and is super convenient how quickly it comes together! Not to mention the kids like it too!
I based this recipe off of a low carb pizza crust recipe we enjoy that I found on the Atkins website when I was originally looking for a gluten free pizza crust recipe.
What Flour Does This Crust Use?
This recipe uses almond flour as its main ingredient. This keeps it low carb, and is a relatively cheap flour compared to using a gluten free flour blend. The almond flour lends itself to almost any flavor pairing, and as a bonus you don’t need to use any cornmeal to coat your pizza pan.
Other Ingredients You Will Need:
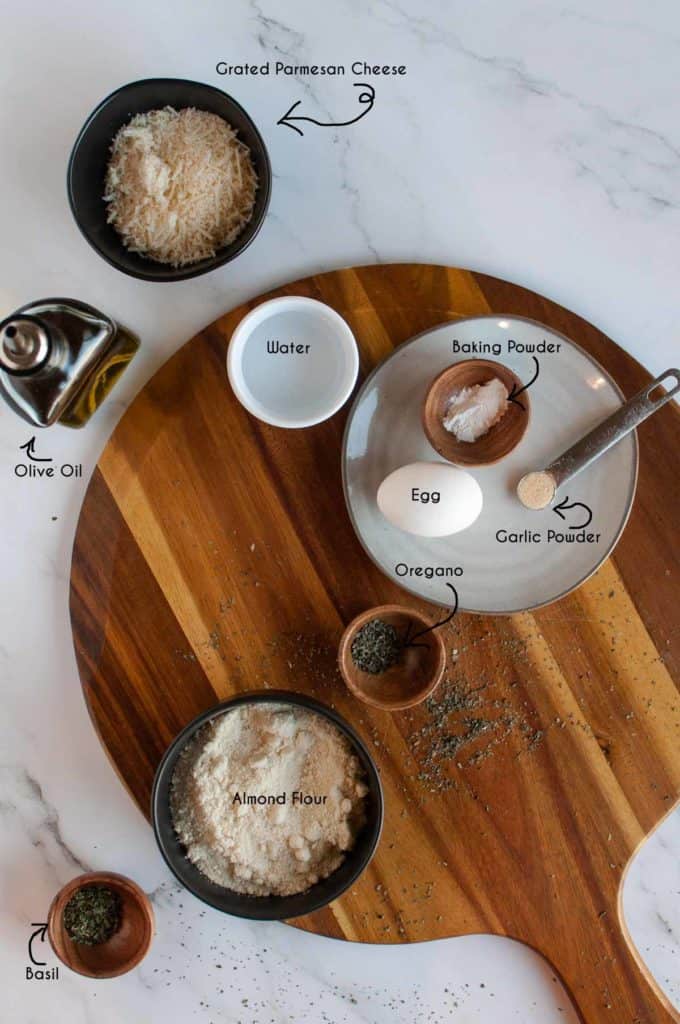
- Grated Parmesan Cheese
- Baking Powder
- Oregano
- Basil
- Garlic powder
- 1 egg
- Water
- Olive oil
Can I use the Parmesan Cheese Powder in this Gluten Free Pizza Crust Recipe?
Putting parmesan cheese in the crust really adds a ton of flavor and helps to bind this crust together as it bakes.
Using grated fresh parmesan is ideal, both for flavor and moisture. I like to buy the pre-grated refrigerated bags to have on hand whenever I need. (Costco is great for this!)
In a pinch you could use the dried powder, but results won’t be as consistent. I would add an additional 1 teaspoon of both, oil and water, for moisture and to counterbalance the fat content.
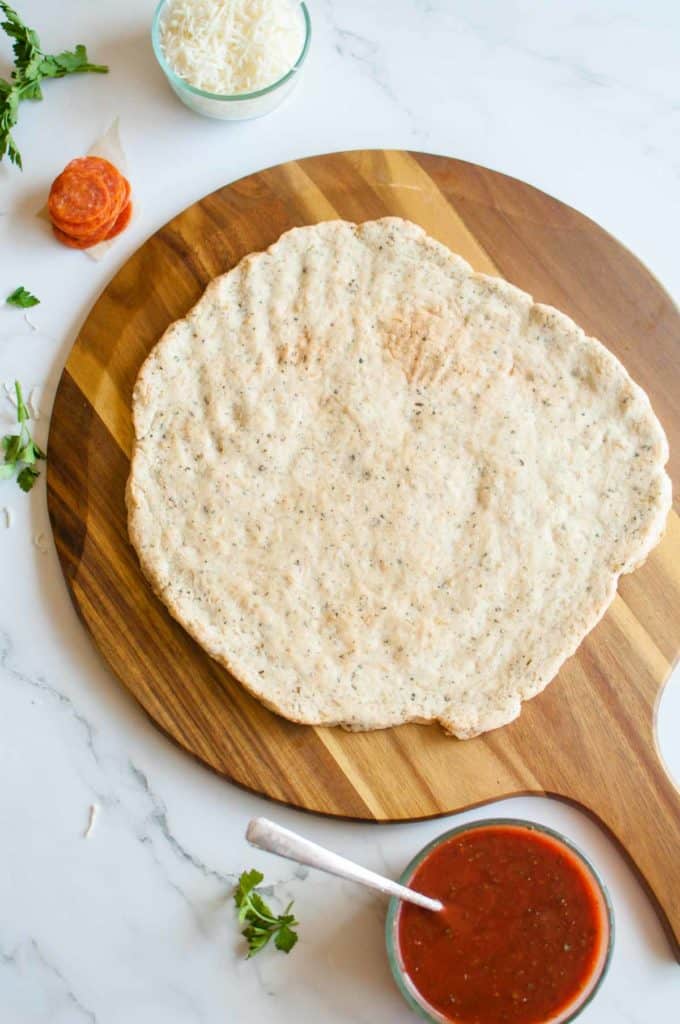
How to Roll Out This Pizza Dough
Though this recipe hits all the high notes in being a gluten free, no yeast pizza crust, AND low carb, this also means that the dough will act differently from traditional pizza dough.
The main thing with this crust is that you don’t want to try and roll it out traditionally. This is a blessing in disguise, as my method for this crust is incredibly quick and convenient! If you try to roll this dough out traditionally, you will have a sticky mess on your hands and it will fall apart as you roll. Believe me I’ve tried.
- While your oven is heating, line a baking sheet or pizza pan with parchment paper
- Spray the parchment with cooking spray or coat it with a light spread of olive oil.
- Dump your pizza dough out onto the greased parchment
- Line up two pieces of plastic wrap about 18 inches long to make one wide piece that will be wide enough to accommodate the finished crust.
- Lightly grease the one side of the plastic wrap then lay this greased side down on top of your pizza dough.
- Working with your hands, evenly press the pizza dough, under the plastic wrap, into a circle the size of your pizza.
- Use one hand to help form the edge just slightly higher, pressing and smoothing all around the edge.
- Remove the plastic wrap and proceed with baking.
Can I Put My Toppings On Before I Bake the Crust?
Though this holds up well baked for toppings, It is a bit fragile before baking. In order to allow this gluten free pizza crust to bake evenly and not fall apart, you will need to pre-bake the crust. Any sauces and toppings should be put on after the pre-baking.
How to Bake The Crust:
This recipe can be made with or without a pizza stone. Pizza stones make for a bit crispier and fully toasted crust. If you do not have a pizza pan, a traditional rectangle baking sheet also works just fine. If you are using a traditional baking sheet, then depending on the size of your pan, you may need to make it more of an oval rather than a circle, to accommodate the pan.
- Preheat your oven to 375° F and set your oven rack to middle position. (if you want to use a pizza stone for your final baking, then put it in the cold oven and let it heat on the bottom rack with the oven.)
- For the pre-baking: press out your crust as directed on an oiled and parchment lined pan.
- Bake for 20 minutes, keeping the crust on the lined pan.
- Let the crust cool slightly before topping.
- When you are ready to top your pizza, then heat the oven up to 425° F
- If using a pizza stone, then move it up to the middle rack and let it continue to heat with the oven. If not using a pizza stone then just keep the crust on the lined baking sheet/pizza pan.
- Top your pizza as desired, leaving a ½ inch rim for the crust.
- Place the topped pizza on it’s pan into the oven, or slide the pizza onto the hot pizza stone.
- Bake 10-15 minutes until the cheese or toppings are hot and melted

Can I Make This Pizza Crust Ahead of Time?
Most pizza crusts can be made ahead of time. Since this recipe is a gluten free, yeast free pizza crust, it is a bit more fragile. With that in mind, yes you can make it ahead just not top it as far in advance.
The crust can be made ahead of time, but do not top the pizza until you are ready for the final baking and ready to eat it. If you top the pizza too far ahead of time then the sauce will soak into the crust too much and make it soggy.
I like to make the crusts and pre-bake them earlier in the day, that way they are good to go and come together even faster at dinner time!
To Freeze The Pizza Crust:
If you want to freeze this pizza crust then you can freeze the pre-baked crusts. Make sure it is fully cooled, then wrap completely in plastic wrap, then wrap again in foil. The crust will keep in the freezer for up to a month.
When you are ready to use the pizza crust, then let it thaw completely and give it a quick 5 minute bake in the hot (425° F) oven before you top it. The moisture from sitting and thawing does cause it to lose some structure initially, so, giving it this quick heat in the oven re-crisps the crust, allowing it to hold up to the toppings.
Pizza Topping Ideas:
This crust works well with any flavor pairing but here are some of our personal favorites!
- Red Sauce, sausage, sliced onions, green bell pepper slices, cheese blend.
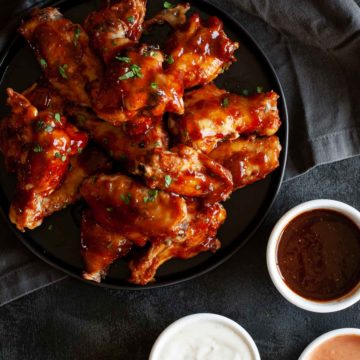
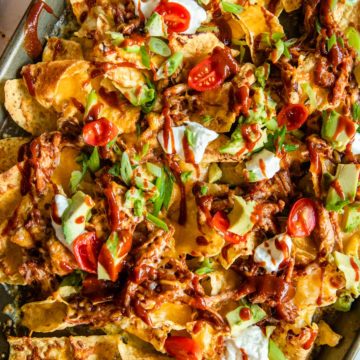
- BBQ Sauce, chicken, bell peppers, onions, cheese blend
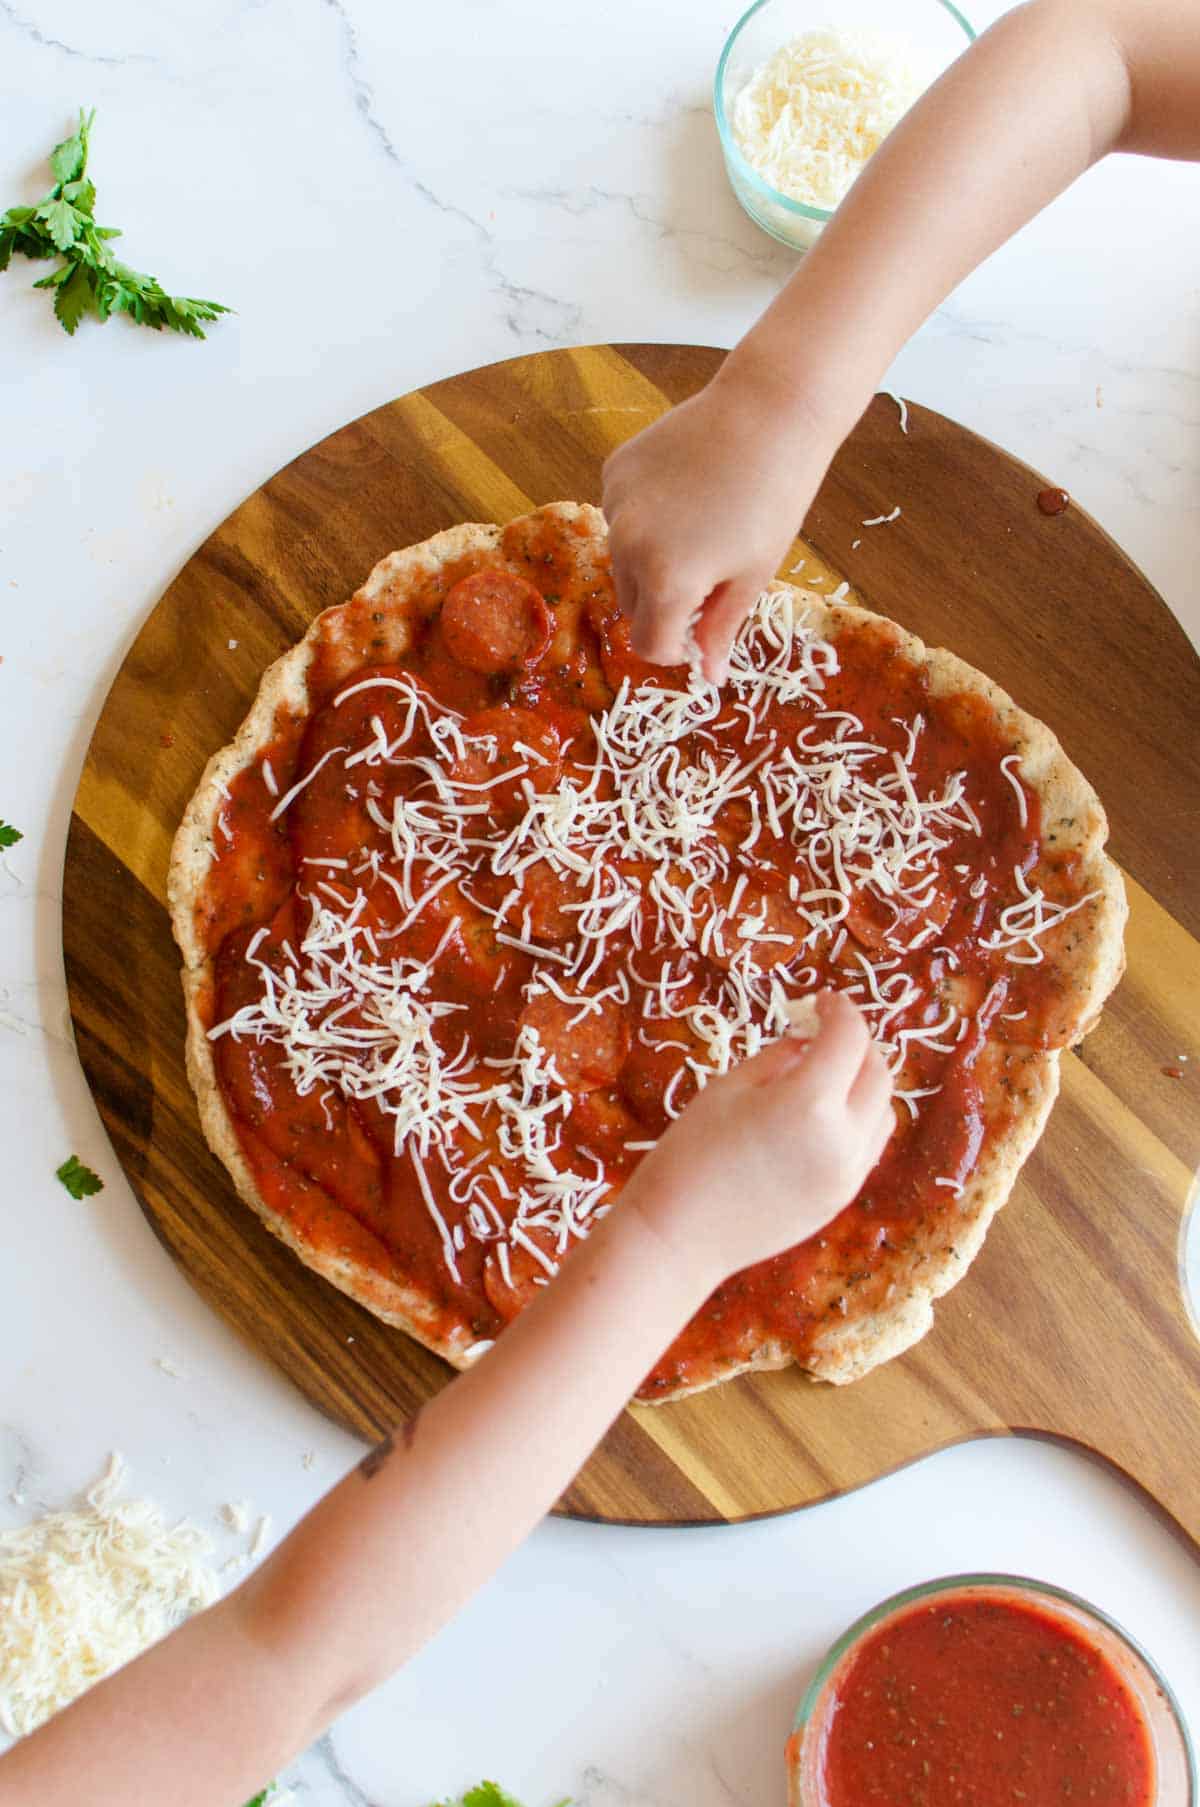
- Traditional red sauce with pepperoni and cheese!
- Goat cheese and pear pizza with roasted garlic and bacon. (Topped with a drippy egg, this makes for the ultimate stay at home date-night pizza)
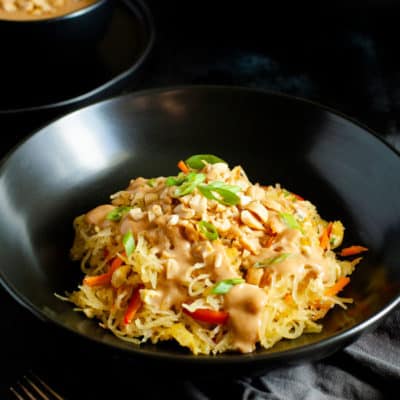
Need More Recipe Inspiration? Try These Reader Favorites:
Gluten Free No Yeast Pizza Crust
This gluten free, no yeast, pizza crust recipe is our favorite go-to recipe and can be made last minute since you don’t need to let it rise!
In addition to being gluten free, this crust has the bonus of also being a low carb pizza crust. It provides a whole lot of flavor, is remarkably sturdy for all your toppings and is super convenient how quickly it comes together! Not to mention the kids like it too!
Ingredients
- 1 3/4 C. Almond Flour
- 1/2 C. Parmesan Cheese, Grated
- 3/4 tsp. Baking Powder
- 1 tsp. Oregano
- 1 tsp. Basil
- 1/4 tsp. Garlic Powder
- 1 Egg
- 1/4 C. Water
- 1 TBSP. Olive Oil
Instructions
- Preheat oven to 375° F and place your oven rack in middle position. (If using a pizza stone for final baking, begin heating it with the cold oven now on the bottom rack)
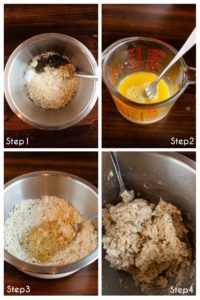
- Combine almond flour, parmesan, baking powder, oregano, basil and garlic powder in a medium bowl and stir to combine.
- In a liquid measuring cup or small bowl, whisk together the egg, water and olive oil.
- Pour the egg mixture over the dry ingredients and stir well to thoroughly mix.
- Line a baking sheet or pizza pan with parchment paper, and lightly coat with olive oil or cooking spray.
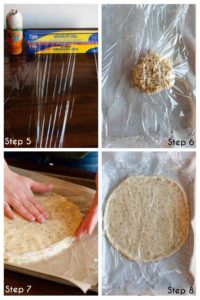
- dump your pizza dough onto the greased parchment.
- Line up two pieces of plastic wrap about 18 inches long, to make one wide piece that will be wide enough to accommodate the finished crust.
- Lightly grease the one side of the plastic wrap, then lay this greased side down on top of your pizza dough. (see step photos in blog post if needed)
- Working with your hands, evenly press the pizza dough, under the plastic wrap, into a circle the size of your pizza about 12-14 Inches diameter.
- Use one hand to help form the edge just slightly higher, pressing and smoothing all around the edge.
- Remove the plastic wrap and bake for 20 minutes until just beginning to brown and crisp.
- Let cool slightly then top as desired
- Bake topped pizza for 10-15 minutes in a 425° oven.
Notes
See blog post for topping ideas, step by step photos and instructions for freezing this crust ahead of time or how to use a pizza stone with this recipe.
Nutrition Information:
Yield:
8Serving Size:
1Amount Per Serving: Calories: 190Total Fat: 16gSaturated Fat: 2gTrans Fat: 0gUnsaturated Fat: 13gCholesterol: 28mgSodium: 157mgCarbohydrates: 6gFiber: 3gSugar: 1gProtein: 8g
*Nutrition information is automatically calculated and may not always be accurate.
You’re totally right – EVERYBODY needs a go-to recipe for pizza crust – no need for takeout! I love that this doesn’t have to rise (because … ahem … I may or may not always plan ahead for dinner lol)! And of course, it’s awesome that it’s sturdy, so I can really pile on the toppings!
This post is so helpful! I love how well you broke down each step and explained your reasoning behind ingredients and techniques. So excited to finally have a gluten-free pizza crust recipe to turn to!
I’m glad it was easy to understand. I was worried the unique way of rolling it out would sound too complicated, but with pictures it works out!
Made this tonight and I did not hear one complaint from my kids. In my book that is a total win.
Definitly the definition of a win around my house! 😂
Super helpful gluten-free pizza crust! This will definitely get put to good use!
Super easy pizza dough! Love the gluten free option and how quickly it’s done!
I often forget to prep yest dough ahead so it’s nice to have a no-rise option!